So today I decided it was time to start experiments with the finishes on the ferro cement test shape. I have been doing Internet research and found a few folks who describe using silica-sand (AKA flint silica) to make a slip out of the cement. Color is, or can be, added at this time into the mixture. The slip is pained on and then when it has set it is sanded down and the process is repeated until a silky smooth surface is achieved. I am guessing at the ratios and tried a 2:1 mixture of silica:cement. I also didn't have acyclic so I tried some gouache I had. I applied it to my test object after it I made sure it was damp.
What I will look for is,
- how fast it dries
- how stable it is with all this stuff added
- how easy it sands
- how quickly I can re-coat
- how many coats I will need to get it smooth.
It's all an experiment and we'll see how things look later today.
Monday, February 22, 2010
Ferro Finishes
Sunday, February 21, 2010
Experiments in Ferro Cement
In an earlier post I spoke about working with Martha Ferris on a commission in Jackson at the Museum of Art. As Martha finalizes designs for the works I have been doing some experiments in a process called ferro-cement. We think this may be the process we are going to use for building the outdoor structure for the commission and to make sure I know everything I can about it I decided to go ahead and do some experiments. The process is fairly easy; I have done it before. What makes this project different are the colors and surfaces needed for this project are for more refined that I have done in the past. Bright colors and smooth, almost shiny surfaces are needed for what we are constructing. I have found many examples of this on the Internet, so I know it can be done and done well. I just have to learn how to do it myself. The funny thing about this whole process is that I had been making some plans and drawings for my own designs using this method and now it's kind of like killing two birds with one stone.
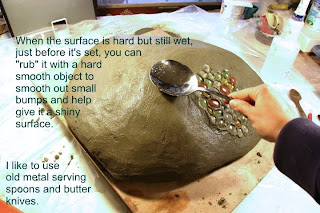
Below is a step-by-step description of the first part of the project. The second part will entail descriptions of final surface treatments and coloring. Click on images to make them larger.
Subscribe to:
Posts (Atom)